Monday, November 4, 2019

Deep Dish Lard: Sharp Practice 2 Revenge at Turks Head Tavern

Here we are for part 2 of Too Fat Lardies Mid West Lard: Deep Dish Lard 1.  The event was at Noble Knight Games in Fitchburg near Madison Wisconsin. The event was well attended. Between the morning and afternoon session we had some pizza (not deep dish as we're in Wisconsin) and some beers (because we're in Wisconsin) I didn't take any photos of either the festivities or later games because of the said beer and I was running my own game.


Here is the initial setup for my game, using Sharp Practice 2 in 15/18mm: Revenge at Turk's Head Tavern set during the Philadelphia campaign of 1777 in the American War of Independence.  This is a rescue scenario where the Brits/Loyalists/Hessians have to rescue a captured informant.   In previous games I would run it as a sweep the table scenario where the Patriots needed to find and captured the mentioned informant.


Here are the Patriots marching in the board. They have a much shorter distance to match but can only bring in one leader per turn.  I tried something new by scattering medics, preachers, water and ammo carts on the board in case they were needed. 

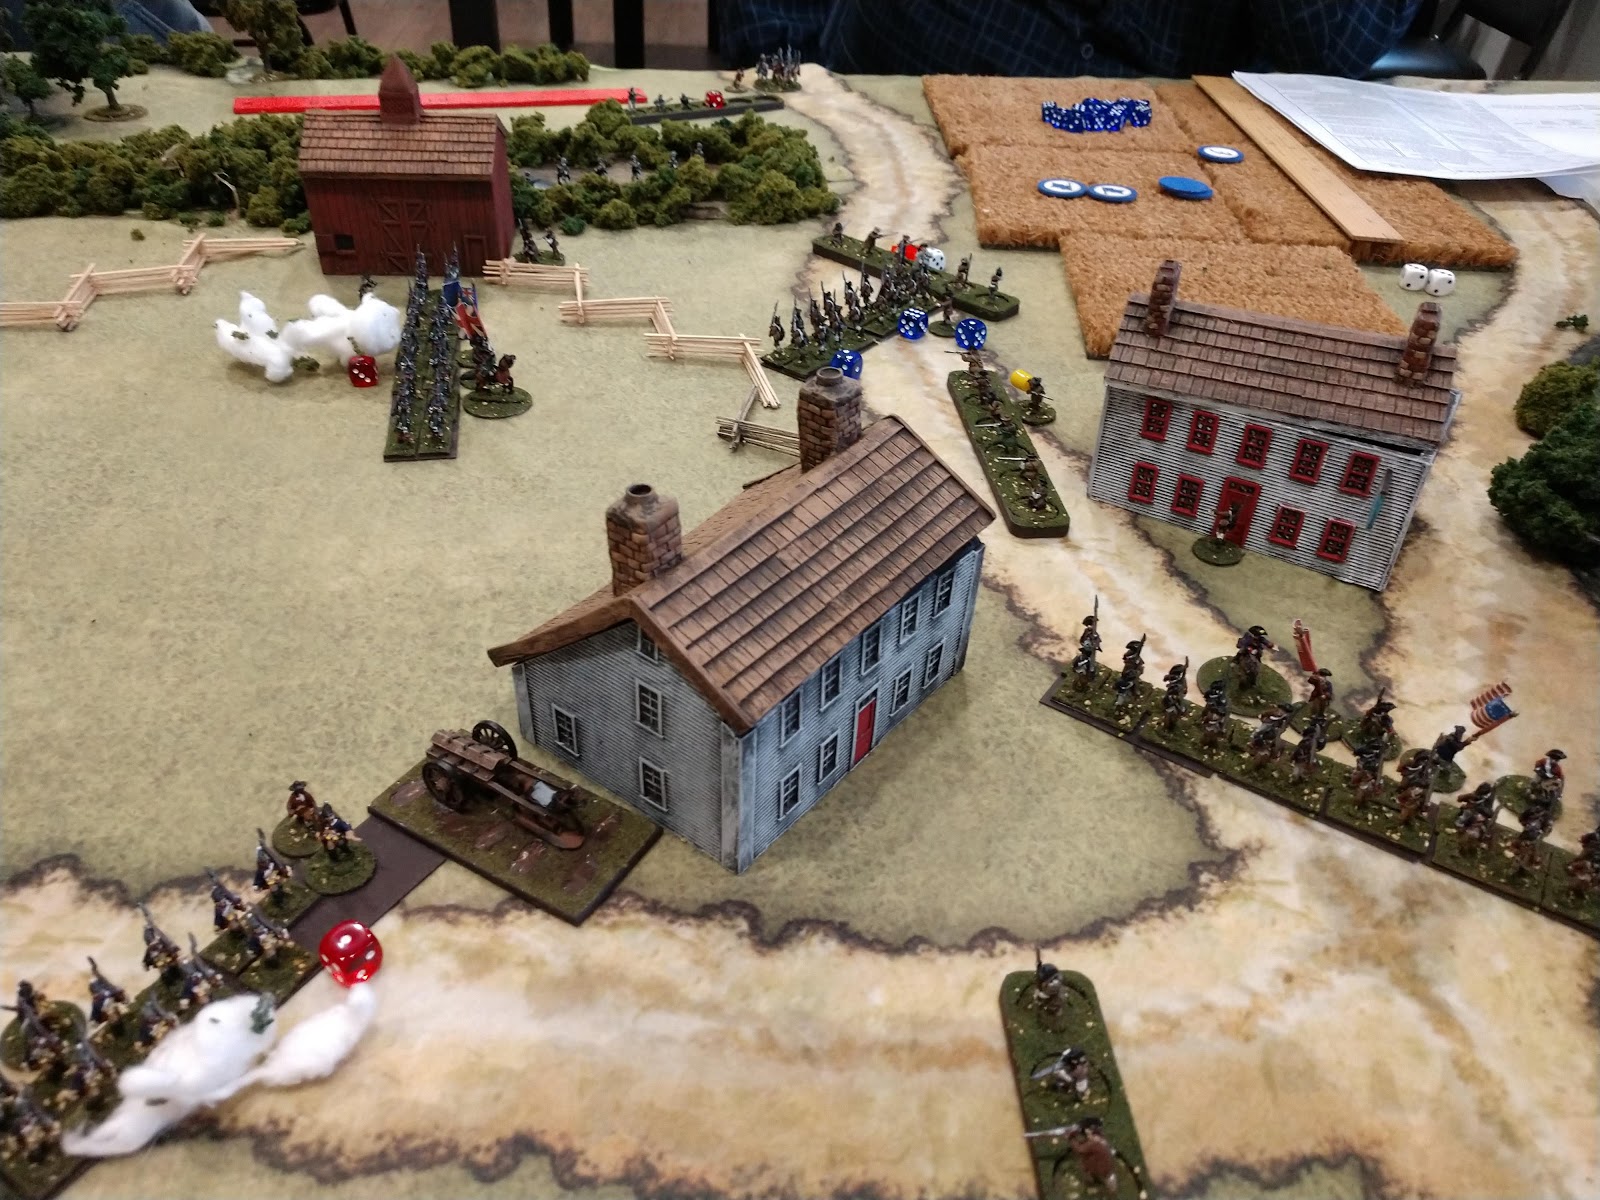
One British player substituted his Tories for some Hessian Grenadiers and Jagers.  Here the Hessians are deploying in line as the approach the village. Hessian Jagers are up by the baen, awefully close to deploying continentals.  Jagers are armed with rifles so shouldn't get so close. Anyways most id the fighting was really close so even Patriot riflemen were often firing at close range.

Loyalist Highlanders deploy and move towards the objective.


Heavy fighting ensues near the objective.  Riflemen try to hold off the Hessians as more continentals move up.


The Continentals in the rear were flanked by loyalist skirmishers.  The Patriots right flank has been turned and their deployment point is undefended. Me


Patriot's right is in shambles.

Riflemen hold of the Hessians as Continentals approach.  The Continentals did end up forcing the Hessians to retreat.  The Patriot deployment point was captured and severely reducing their morale almost to the breaking point.  The objective remained in Patriot hands. Great game and a close run battle. Thanks for everyone who played.

Sunday, October 27, 2019

Deep Dish Lard, Two Fat Ladies Midwest #1, October 2019

This was the first Too Fat Lardies convention for the new Midwest chapter: Deep Dish Lard.  It was organized by Ed and Liam Harding, who I met at Little Wars this past April.  It was great to be invited and get to play and run some Too Fat Lardies games.  It was held at Noble Knight Games near Madison Wisconsin.  Although it was over two hour drive, it was worth attending and look forward to it next year.

Here's a picture of Noble Knight's impressive game room. They also have quite a selection of anything gaming and miniatures. I have ordered from them a few times online and they always have excellent service.  Unfortunately due to all the great gaming I didn't have time to browse or shop. Guess I just do that online.

Here is my Sharp Practice 2, Turk's Head Tavern game I ran in the afternoon. Sine the tables were available I set up early.

Here's a great Chain of Command game set in Normandy. They managed to get two game in the morning slot.

This is Ed Harding's stunning Sparp Practice 2 game set in the Jacobite Rebellioniin 1745. Here the game was an escort mission where the focus is a barrel of whiskey.  I really want to play one of Ed's Jacobite games, they look brilliant.


Here's one of Liam Harding's Vietnam games in 15mm.  Another one I would like to try.  There were so many games it was hard to pick one.


Here's another CoC game.

This was an interesting Sharp Practice  game set in the Black Hawk war in 1832, featuring Abe Lincoln and Black hawk himself.


Blackhawk?


Here was a cool What a Tanker game set in the Eastern front in WWII

I really wanted a CoC game and played Paul Scrivens-Smith's Burma game.

I took the Brits and my opponent Drew took the Japanese.  I was the attacker and I needed to take a bridge defended by a bunker. Figures were beautifully painted and much of the buildings and terrain were hand made by Paul.

Here I deployed a section and 2"mortar to keep the Japanese bunker busy.  I was rolling lots of 2s, 3s and 4s so I had trouble getting the 2" laying smoke and get my scouts moving.

There are my scouts stranded without any 1s. A Sherman moves up.

Now I have a section in the center.

The Japanese bunker out a world of hurt on my left section along with the knee mortar squad. Priority was to get smoke in front of that bunker. 

Here's Paul's beautiful bunker. Ilve been trying to smoke, but kept landing off target.


Ok, got to get this section in the village to cover the bridge which is my objective.


Sherman fires on the bunker, and the scouts are stranded with few ones being rolled. The 2' had priority.

Paul says I need my smoke to land here.

Right section taking hits an gets pinned. Bother senior and junior leaders knocked out.

Japanese section depoys now my scouts are threatening a deployment point.

Finaly, three time the charm. The 2' mortar finally lands smoke in target. But my opponent Drew had a CoC die, what will he do, end the turn?

Ambush!! Japanese suicide anti-tank team amushes my tank. I moved it up to engage the Japanese section.

Close up: they score three hits, but I have six to save. What will I role?...

No saves, Sherman burns!! AAGGHHHH!!!! That takes a big hit to my morale.

Section deploys on the right.


Japanese section attacks and wipes out my scouts. I ambush with a Vickers who wipes out the Japanese.

Japanese section deploys and charges my center section.  The fight is on.

I actually win the fight and wipe out the Japanese but I'm forced to fall back taking my morale beyond the breaking point. Game over.


This was a great game run by Paul and well played by Drew.